
Customizing the Field of View for the Video Doorbell Series 2
Your Video Doorbell Series 2 has a 150-vertical degree, head-to-toe field of view. If you want to change what the camera visually captures, you'll need to physically adjust the doorbell's angle using the included adapters.
Determine Which Adapter You Need
Your Video Doorbell includes two mounting adapters in the box: the Corner Adapter and the Wedge Adapter.
Corner Adapter: Use this when you want to tilt the camera’s view to the left or right.
Wedge Adapter: Use this when you want to tilt the camera’s view upward, which is especially helpful when installing the Video Doorbell on angled siding.
Install the Corner Adapter
If you're installing the Video Doorbell on a slanted surface, or want to adjust the camera's view by 15 degrees to the left or right, install the included Corner Adapter to ensure your Video Doorbell captures your desired view.
Turn the mounting bracket around so its back is facing up
Connect the mounting bracket to the side of the Corner Adapter marked "C"
To tilt your Video Doorbell to the left, make sure the letter "D" on the front of the Corner Adapter is on the right side
To tilt your Video Doorbell to the right, make sure the letter "D" on the front of the Corner Adapter is on the left side
After connecting the Corner Adapter to the mounting bracket, you may either install the Wedge Adapter to tilt your Video Doorbell's view upright, or secure the mounting bracket to the surface by following the steps below.
Install the Wedge Adapter
Use the Wedge Adapter if you want to tilt your Video Doorbell's view up. The Wedge Adapter can be installed on top of the Corner Adapter, or directly on the mounting bracket.
On Top of the Corner Adapter
Hold the mounting bracket and Corner Adapter together, with the letter "D" on the Corner Adapter facing up
Connect the side of the Wedge Adapter marked "B" to the "D" side of the Corner Adapter
Tilt it upright and confirm the thickest part of the Wedge Adapter sits at the top of the mounting bracket
Directly on the Mounting Bracket
Turn the mounting bracket around so its back is facing up
Connect the bracket to the side of the Wedge Adapter marked "A"
Tilt it upright and confirm the thickest part of the Wedge Adapter is at the top of the mounting bracket
Secure the Mounting Bracket to The Surface
Thread your doorbell wiring through the opening of any adapters you installed and the mounting bracket
Hold the mounting bracket in place and drill pilot holes through the top and bottom holes of the mounting bracket
If you are installing the Video Doorbell on a wood or vinyl surface, use a drill with a 3/32 inch drill bit
If you are installing the Video Doorbell on a brick, stone, or stucco surface, you will need to insert wall anchors into the pilot holes
Use a drill with a ¼ inch masonry drill bit to create your pilot holes; and then use a hammer to lightly tap the wall anchors into place
Line up the mounting bracket and any attached adapters with the pilot holes
Secure them in place using the included screws and your own Phillips head screwdriver
If you are installing just the mounting bracket without any adapters, you can affix it to your surface using the two shorter screws
If you have attached any adapters to the mounting bracket, you will need to use the longer screws
Setup Activity Zones
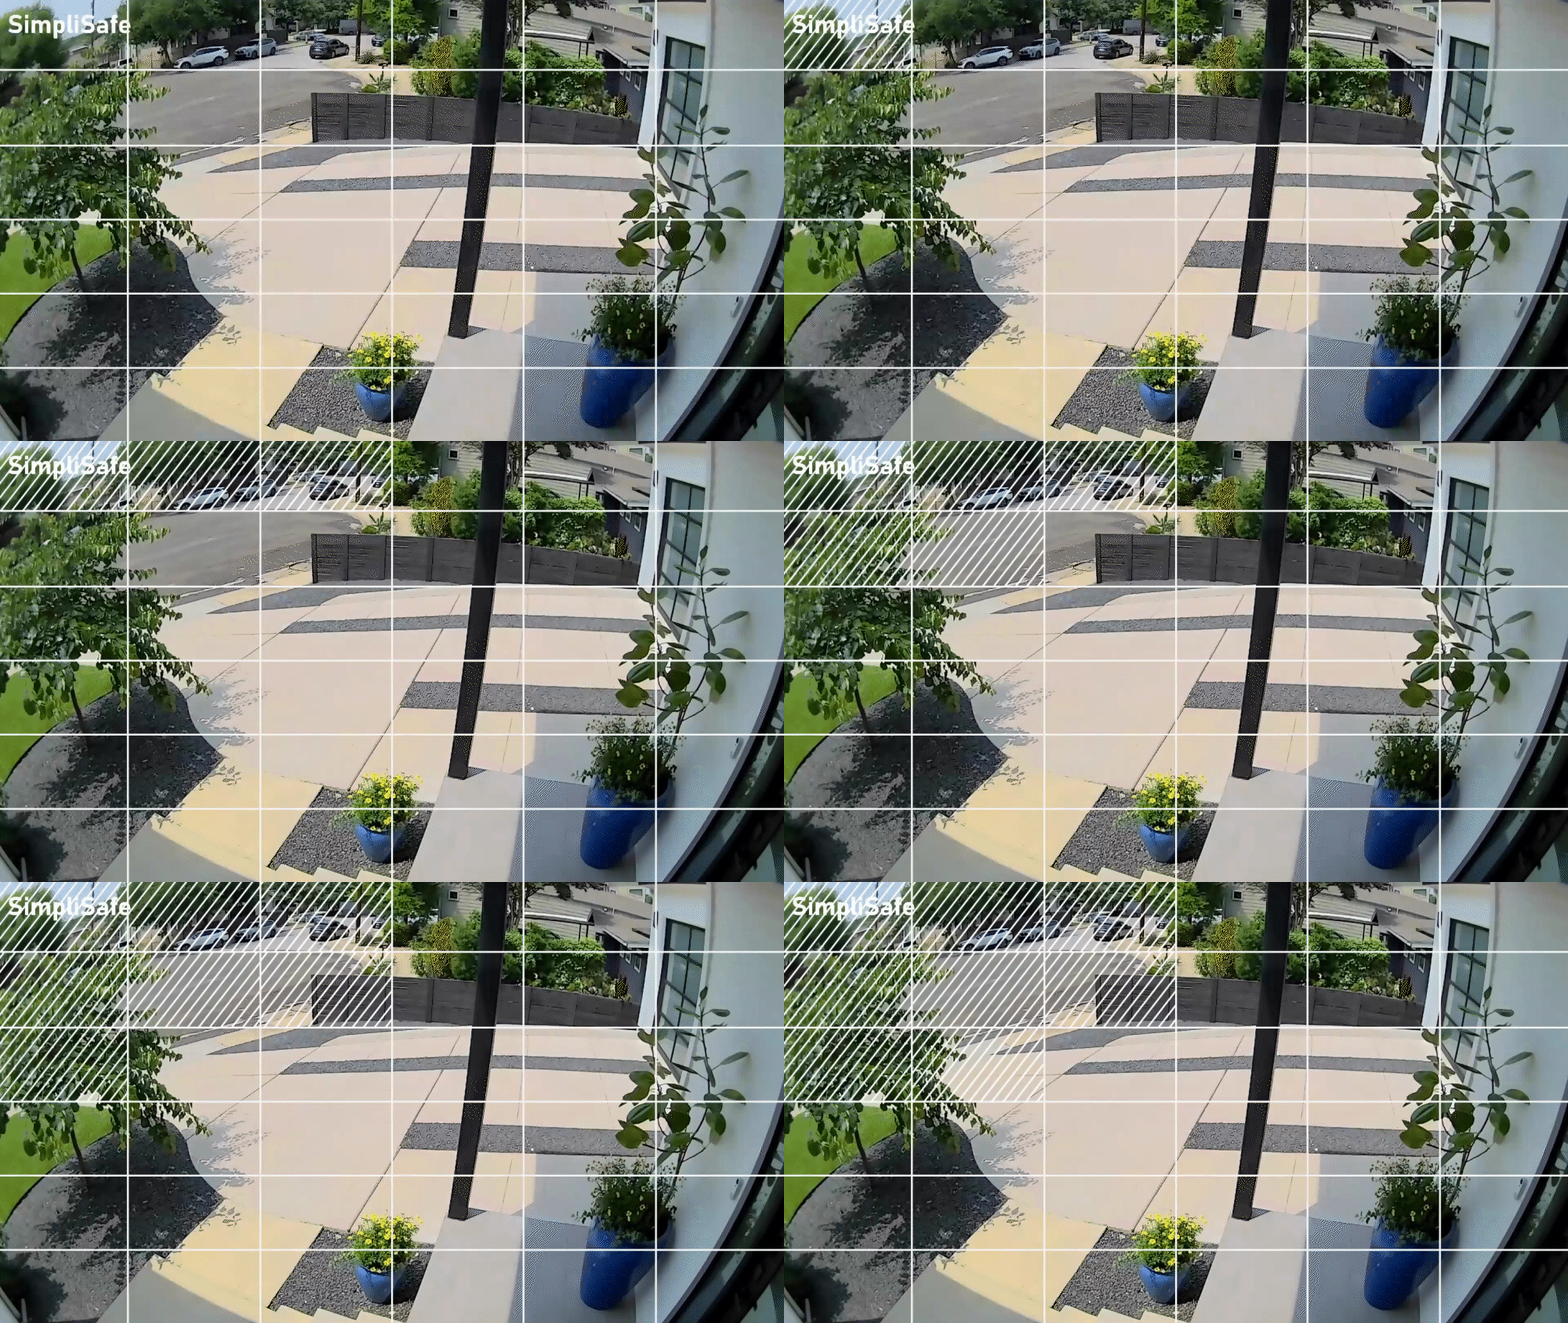
Activity Zones don't change your Video Doorbell's field of view, they control which parts of the existing view trigger motion detection. If you want to change what the camera visually captures, use an adapter as described above. If you want to stop motion alerts from an area already in frame, such as a sidewalk or neighboring driveway. To customize Activity Zones:
Open the SimpliSafe® Mobile App (opens in new tab) on your phone or tablet
Select My System from the navigation menu on the bottom of the screen
Select Camera Settings and then choose your Video Doorbell from the list of devices
Tap Motion Detection
Under Activity Zone, select the areas where you do not want the Video Doorbell to detect motion
Still Need Help?
If you've tried the above and still can't get the view you want, don't hesitate to contact our Support team (opens in new tab) for additional assistance.